
Well, I do. After I took this picture, Tom pulled a rose off of the floral arrangement and gave it to me to save.

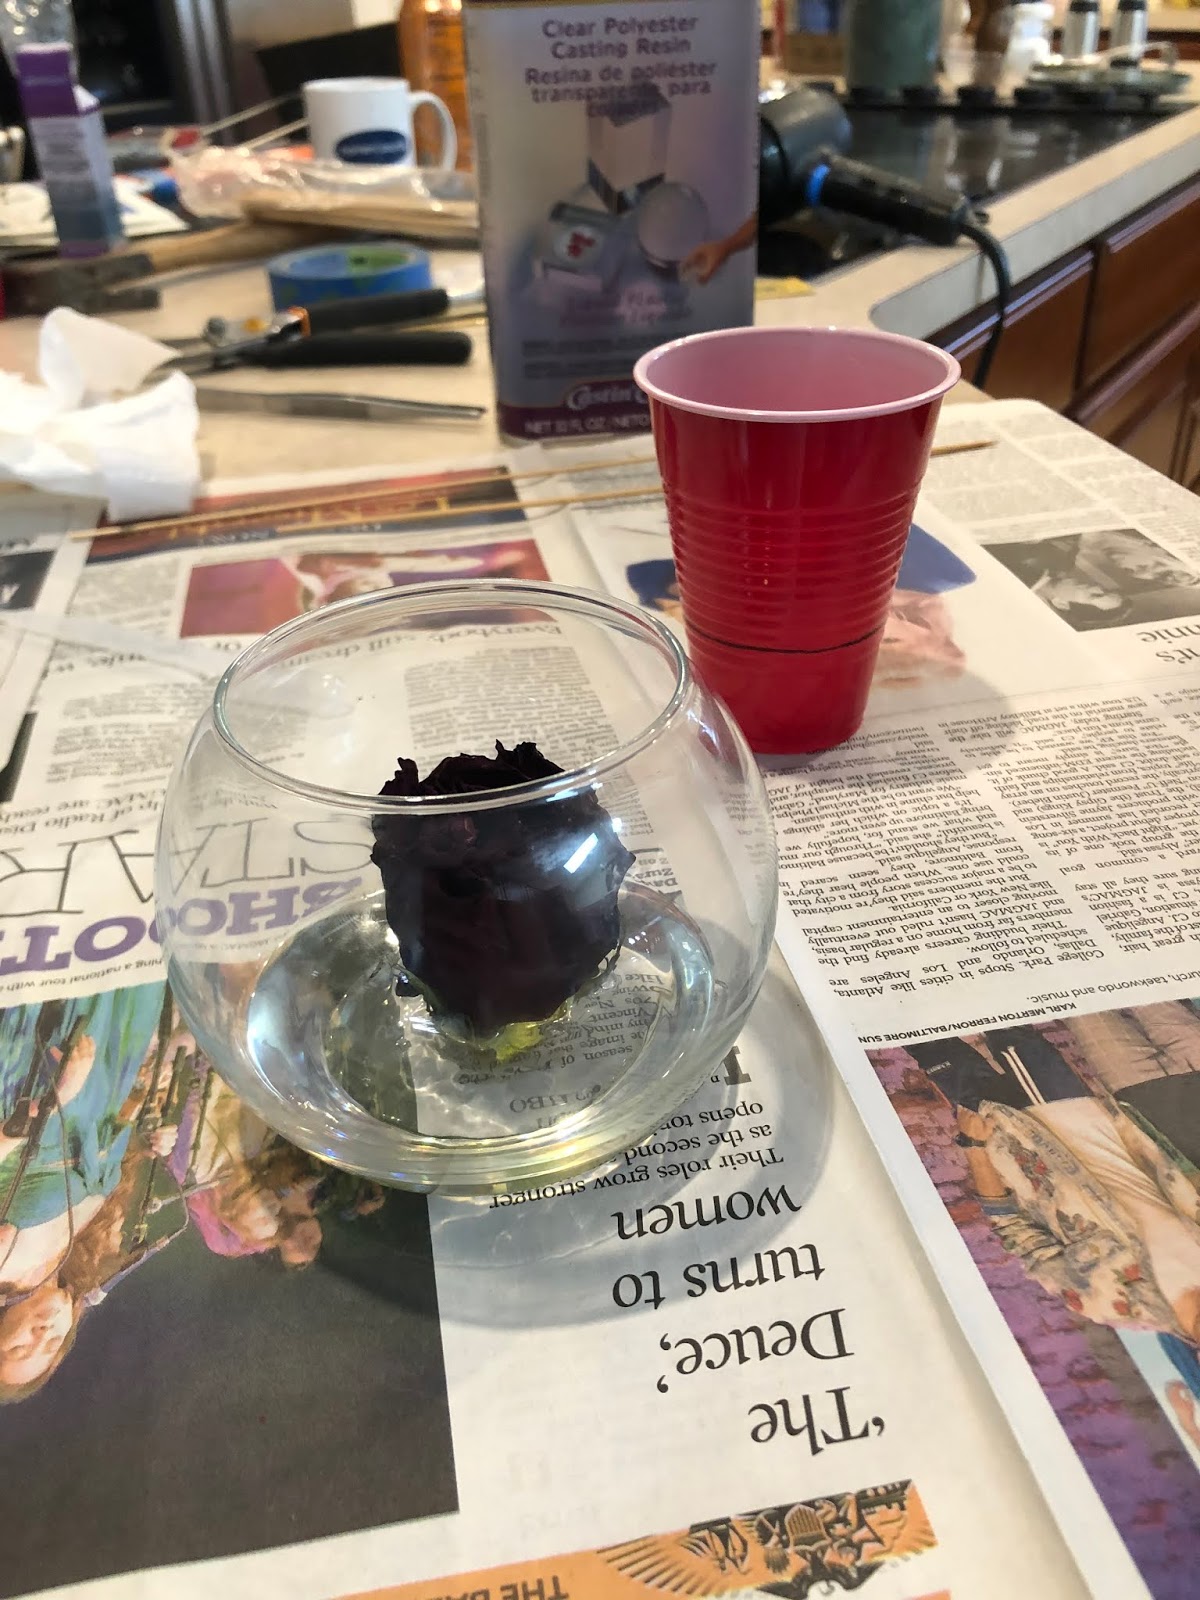
I wasn’t quite sure what I wanted to do with it. My initial thought was to preserve it with glycerine, but after some Internet research I ultimately decided to dry it and put it in a vessel in resin. I thought of using a wine glass at first, I have one that’s big enough, but it would be so top heavy that with my luck, it would topple over and break. The next best idea was a small, round bowl, and that’s what we decided to go with.
The first step was drying the rose. I think I would have preferred the method using silica gel, but I didn’t have any, so we just hung the rose upside down and let it dry for a few weeks. Then, today, we started working on the project. One of the YouTube videos that I watched made me think that it would take several days to complete the project, but after reading the instructions on the resin that I’d bought, we decided to do this project in one day. We had bought Castin’ Craft Clear Polyester Casting Resin along with the Castin' Craft Casting Catalyst. I’d decided to do five separate pours, with each pour being about a ½ inch high in the bowl, so I figured out how much resin I’d need for each pour and marked five cups along with the amount of catalyst needed for each layer.

We started by cutting the rose right where the stem met the flower.

We mixed the resin and catalyst for one minute, then poured it into the bowl.


Then we put the rose in.

It took about 30 minutes of sitting there trying to stand up the rose before the layer hardened enough for the rose to stand alone.
Then we mixed the second cup of resin and poured it over the rose; we initially tried to pipette the resin in between the petals, but we got impatient. We took some wooden skewers and tried to get the resin in between the petals – and hopefully reshape the rose a little bit (it had flattened a little while it dried).

We played with it a little bit too much, and parts of the rose started to flake off into the resin. We were able to suck some of the flakes out with the pipette, and after the resin had gelled a little, we were able to use the skewers to pull some out, but there’s still a bunch in there. We waited until the layer gelled before starting the next one.
We mixed up the third batch of resin and poured that over the rose and waited about 30 minutes, picking out flakes here and there.

The fourth and fifth batches were done one right after the other.

We needed to run some errands, so I got a shower. When I got out, Tom told me that the project was generating a huge amount of heat. It was, and the bubbles that had continued to be generated were now stationary, never having escaped the hardening of the resin. I decided that I could deal with that, it looked a little like dew so, we went out to run the errands. When we came back, we found this.

It looks like the resin cracked – more than likely from the heat. How sad is that? I had one chance to do this right and I screwed up. I will never, ever listen to Tom again! No, I probably will, but I’m so disappointed that I let him talk me in to doing the last two layers at the same time.


No comments:
Post a Comment