

After deciding on the adhesive, we disassembled the cairns and carefully used the caulking gun to place a little adhesive on each stone, then placed them back in order.

Last Christmas I got a great giftDid you get what I did there? I hope so, because I think it's clever. So, anyway...
A crochet magazine with a mark on a page
This here
This pattern right here
Can be made for someone special
Special


When my Dad died, or maybe right before we decided to put him in hospice, the Hospice lady showed us some brochures and flyers for things we could have done for memories. When Mom saw the Memory Bear flyer, she said she wanted one. I decided then and there that I wanted to make one for her. I didn't get the clothing before I left back in July, but when Tom and I visited a couple of weeks ago, I asked Mom if I could have one of Dad's shirts. She said yes, and gave me two! So, I decided to make a bear for my sister, too.
The process started out over a week ago with finding a pattern that I liked. I combed Pinterest and the internet for a free pattern. That was much more difficult than I'd like to admit. Most of the free patterns had something that I didn't like about them - I just didn't like the way that they looked. And even with the keyword "free" in the search, most of the patterns that I did like cost something. Then, I came across the HowJoyful Bear. It was a free pattern and I was able to locate a couple of helpful videos on YouTube. Win-win!
Next came making a practice bear, great advice from yet another YouTube video, since I've never done anything like this before. I found some scrap fabric, cut out the pattern pieces and started pinning them together. Then, I started sewing. Step 1 - sew the ears. Easy. Step 2 - sew the forehead to the sides of the head, with the ears in place. Okay, not too bad. Wouldn't you know it, I got hung up on the third step?!? That's when I found this video and things got much better and started falling into place. I didn't stuff the practice bear, since I didn't have any stuffing at the time, but I did almost everything else, so, after I was able to get some Poly-fil at Wal-Mart, I felt confident enough to cut into my Dad's old shirts.
I worked on both bears at the same time, cutting, piecing, pinning and sewing, and that worked out pretty well. I didn't follow the step-by-step instructions like I did with the practice bear, I ended up sewing all the smaller pieces together before larger, assembly-type things. I also decided to make a slight addition that I'd read others had made, and I stuffed the ears and tail. That added to the difficulty of assembly, but it was worth it. Attaching the front to the back was the most difficult part, since those pieces don't match up perfectly. I ended up with some pinching (not pretty) and/or ruching (which is okay to look at). Attaching the head to the body was pretty bad, too, and I think the heads are going to fall off if these bears are squeezed too hard or abused in any way. I'm thinking about adding a bow around the neck so that my horrible stitching can be hidden.
All in all, the bears are not perfect, but they were made with love and I hope that they are loved and appreciated.

Spaghetti Squash Mac and CheeseTom wouldn't even try it, shocker! I thought it was okay. There wasn't a whole lot of flavor, but could it be because for cheese I used half gourmet sharp cheddar blend and half provolone?
Ingredients
Spaghetti Squash:Cheese Sauce:
- 2 small/medium spaghetti squash about 2 lbs each
- 1 TBS olive oil
- ½ tsp garlic salt (or to taste)
- ¼ tsp freshly ground black pepper (or to taste)
Instructions
- 2 TBS butter
- 2 TBS all-purpose flour* (or gluten-free all-purpose flour, tapioca flour or cornstarch)
- ½ tsp sea salt
- ¼ tsp garlic powder
- 1 ½ cups whole milk
- 2 ½ cups Cabot Shredded Cheddar cheese divided.
Roast the spaghetti squash:Make the cheese sauce:
- Preheat oven to 400 degrees F.
- Cut both spaghetti squash in half and remove the seeds (scoop them out with a metal spoon).
- Brush the inside with olive oil (or spray with an olive oil spray) and sprinkle with sea salt and pepper.
- Place cut-side down in a baking dish.
- Fill baking dish ¼” with water.
- Cover baking dish with aluminum foil.
- Bake in the preheated oven for 45-60 minutes or until the squash is soft to the touch (it will compress down when pushed lightly).
- Remove from the oven and turn the cut-side to the top.
- Let cool.
- Use a fork to shred the spaghetti squash, being careful not to poke holes in the shell.
- Leave shredded spaghetti squash in the shell while you make the cheese sauce.
Putting it together:
- Preheat oven to 375 degrees F.
- In a small bowl, combine flour sea salt and garlic powder. Set aside.
- Melt butter in a medium saucepan over medium heat.
- Add dry ingredients and whisk to combine.
- Whisk constantly until ingredients just start to brown (about 1-2 minutes).
- Add milk and whisk until mixture is smooth.
- Continue cooking over medium-high heat until the mixture comes to a boil and starts to thicken (about 3-5 minutes).
- Once mixture is thick, add 2 cups of shredded cheese and whisk until the cheese is completely melted.
- Once cheese sauce is smooth, remove the saucepan from the heat.
- Distribute cheese sauce evenly among the four halves of shredded spaghetti squash (with the size squashes I had, I used about ½ cup plus 2 TBS of cheese sauce for each of the four halves).
- Use a fork to gently stir the cheese sauce into each half of shredded spaghetti squash.
- Once the sauce is evenly distributed in the squash, use the fork or a spatula to smooth out the surface of each squash half.
- Top with remaining ½ cup of cheese and bake in preheated oven for 15 minutes, or until the cheese on the top is melted and lightly brown.
- Serve warm!

Cottage Cheese LasagnaI can't tell you how much I enjoyed this - and Tom liked it, too! I think I put a little too much oregano and pepper in it, but that didn't detract from the dish overall.
Ingredients:Directions:
- 12 lasagna noodles
- 1 lb ground beef
- ¼ c chopped onion
- 24 oz jar marinara sauce
- ½ t dried oregano
- ¾ t salt, divided
- ¾ t pepper, divided
- ¼ t minced garlic
- 16 oz cottage cheese
- 1 egg, beaten
- ¼ c parmesan cheese
- 1 t dried parsley
- 2 c shredded mozzarella cheese
- 12 slices provolone cheese
- Preheat oven to 350°F. Prepare 9x13 lasagna pan by spraying with non-stick cooking spray.
- Prepare lasagna noodles as directed on box.
- Brown ground beef and onions. Drain. Return to pot, add marinara, oregano, ¼ t salt, ¼ t pepper and garlic. Stir together and continue to heat on low.
- Mix together cottage cheese, egg, parmesan cheese, parsley, ½ t salt, ½ t pepper and mozzarella cheese in a bowl.
- Assemble lasagna. Spread a small amount of meat sauce in bottom of pan and place three lasagna noodles on top. Spread ¼ of the cheese mixture over the noodles, followed by four slices of provolone, a couple of spoonfuls of meat mixture and three more noodles. Repeat two more times. Spread remaining cheese mixture (and/or meat sauce) on top of lasagna.
- Cover pan with aluminum foil. Bake for 40 minutes. Remove aluminum foil and bake for 10 more minutes.

Creamy Herb ChickenBoy, was that full of flavor! Almost too much in my opinion, but Tom said he liked it, soooo, I'd say pickers can't be choosers. Another comment would be that it's a lot of food. I think a half of a chicken breast would have been adequate as a portion size.
Ingredients For The Chicken:For The Sauce:
- 4 chicken breasts (pounded ½-inch thin)
- 2 teaspoons each of onion powder and garlic powder
- 1 teaspoon fresh chopped parsley
- ½ teaspoon each of dried thyme and dried rosemary
- salt and pepper, to season
Instructions
- 4 cloves garlic, minced (or 1 tablespoon minced garlic)
- 1 teaspoon fresh chopped parsley
- ½ teaspoon each of dried thyme and dried rosemary
- 1 cup milk (half and half and heavy cream will also work)
- Salt and freshly ground black pepper, to taste
- 1 teaspoon cornstarch mixed with 1 tablespoon water, until smooth
- Coat chicken breasts with the onion and garlic powders and herbs. Season generously with salt and pepper.
- Heat 1 tablespoon of oil a large pan or skillet over medium-high heat and cook chicken breasts until opaque and no longer pink inside (about 5 minutes each side, depending on thickness). Transfer to a plate; set aside.
- To the same pan or skillet, heat another 2 teaspoons of olive oil and sauté garlic, with parsley, thyme and rosemary, for about 1 minute, or until fragrant.
- Stir in milk (or cream); season with salt and pepper, to taste.
- Bring to a boil; add the cornstarch mixture to the center of the pan, quickly stirring, until sauce has thickened slightly. Reduce heat and simmer gently for a further minute to allow the sauce to thicken more.
- Return chicken to the skillet. Sprinkle with extra herbs if desired. Serve immediately.

Well, I do. After I took this picture, Tom pulled a rose off of the floral arrangement and gave it to me to save.

I wasn’t quite sure what I wanted to do with it. My initial thought was to preserve it with glycerine, but after some Internet research I ultimately decided to dry it and put it in a vessel in resin. I thought of using a wine glass at first, I have one that’s big enough, but it would be so top heavy that with my luck, it would topple over and break. The next best idea was a small, round bowl, and that’s what we decided to go with.
The first step was drying the rose. I think I would have preferred the method using silica gel, but I didn’t have any, so we just hung the rose upside down and let it dry for a few weeks. Then, today, we started working on the project. One of the YouTube videos that I watched made me think that it would take several days to complete the project, but after reading the instructions on the resin that I’d bought, we decided to do this project in one day. We had bought Castin’ Craft Clear Polyester Casting Resin along with the Castin' Craft Casting Catalyst. I’d decided to do five separate pours, with each pour being about a ½ inch high in the bowl, so I figured out how much resin I’d need for each pour and marked five cups along with the amount of catalyst needed for each layer.

We started by cutting the rose right where the stem met the flower.

We mixed the resin and catalyst for one minute, then poured it into the bowl.


Then we put the rose in.

It took about 30 minutes of sitting there trying to stand up the rose before the layer hardened enough for the rose to stand alone.
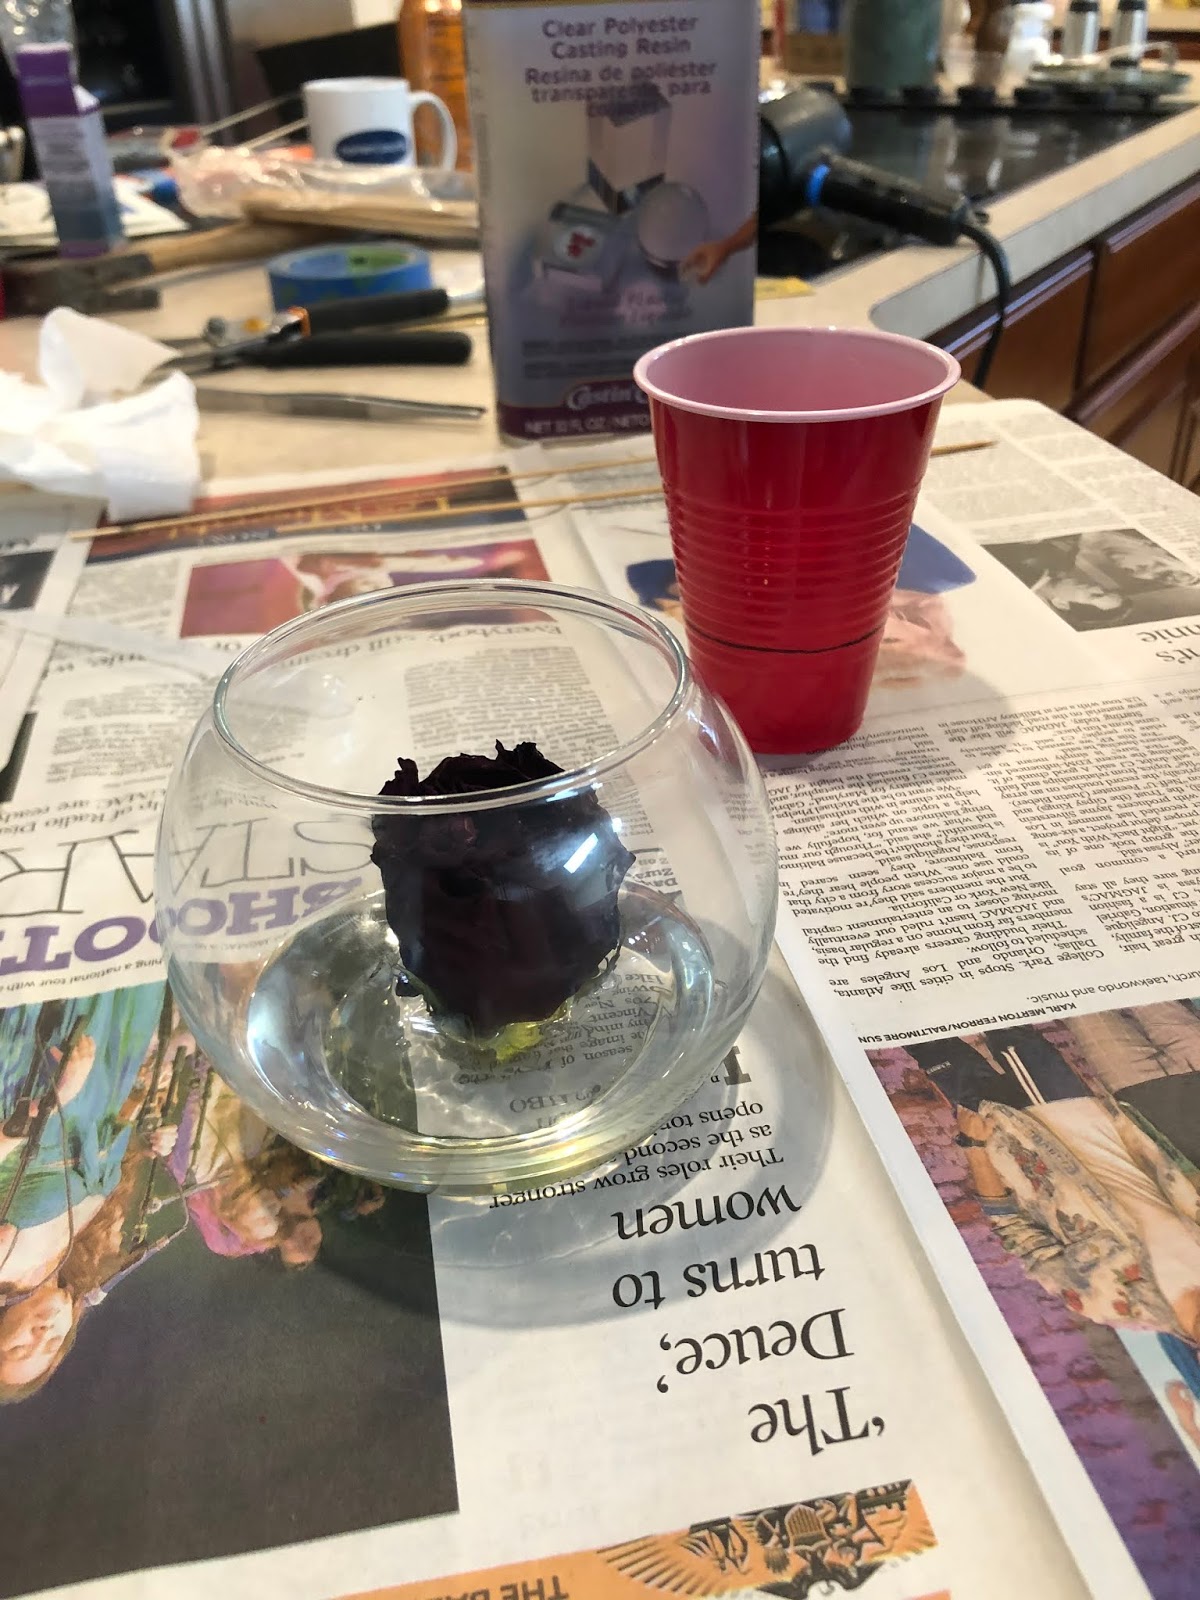
Then we mixed the second cup of resin and poured it over the rose; we initially tried to pipette the resin in between the petals, but we got impatient. We took some wooden skewers and tried to get the resin in between the petals – and hopefully reshape the rose a little bit (it had flattened a little while it dried).

We played with it a little bit too much, and parts of the rose started to flake off into the resin. We were able to suck some of the flakes out with the pipette, and after the resin had gelled a little, we were able to use the skewers to pull some out, but there’s still a bunch in there. We waited until the layer gelled before starting the next one.
We mixed up the third batch of resin and poured that over the rose and waited about 30 minutes, picking out flakes here and there.

The fourth and fifth batches were done one right after the other.

We needed to run some errands, so I got a shower. When I got out, Tom told me that the project was generating a huge amount of heat. It was, and the bubbles that had continued to be generated were now stationary, never having escaped the hardening of the resin. I decided that I could deal with that, it looked a little like dew so, we went out to run the errands. When we came back, we found this.

It looks like the resin cracked – more than likely from the heat. How sad is that? I had one chance to do this right and I screwed up. I will never, ever listen to Tom again! No, I probably will, but I’m so disappointed that I let him talk me in to doing the last two layers at the same time.


