Saturday, May 30, 2020

Classic Slow Cooker Pot Roast

A few days ago, I'd decided to make a pot roast for the weekend, but then the governor of our state decreed that restaurants can open with outdoor seating only! Good news for my pocketbook, bad news for my dinner plans. I've been working on restaurant stuff in my free time for the past few days, so I haven't had time to cook, and I didn't want Tom to suffer unduly. It was also up in the air about whether or not I'd be working all day, so I decided to fix this dish - a Classic Slow Cooker Pot Roast.

Classic Slow Cooker Pot Roast

Ingredients
  • 1 3-5 pound Chuck Roast
  • salt and pepper
  • 1 c. beef broth
For the Rub
  • 1 T. Kosher salt
  • 1½ tsp. black peppercorns (multi-colored is fine, too)
  • 1 T. fresh rosemary or 1 tsp. dried
  • 1 T. fresh thyme or 1 tsp. dried
  • 2 garlic cloves
For the Gravy
  • 2 Tbsp. cornstarch
  • salt and pepper to taste
Instructions
  1. Searing the roast in this recipe is optional. You can read about the pros and cons of searing the roast in this post.
  2. To sear the roast, heat a heavy duty pan over medium high heat. Add enough olive oil to cover the bottom of the pan. While the pan is heating, pat the roast dry with paper towels. Season it with salt and pepper. Set the roast in the hot pan and let it sear until it isn't stuck to the pan. Flip and repeat the searing process until all of the sides are seared. Remove the roast from the pan and set it on a plate.
  3. While the roast is searing, make the rosemary rub. Chop herbs, mince garlic and crush peppercorns.
  4. To crush peppercorns, add them to a sealable bag and whack them with a rolling pin. You could also put them in a food processor. Combine kosher salt, crushed peppercorns, garlic, and herbs.
  5. Rub a little olive oil over the roast. It will help the rub to stick to the roast. Sprinkle rub over the roast, using fingers to gently press into the roast.
  6. Set the roast in the slow cooker. Add beef broth to the slow cooker, being careful not to pour it directly on the roast, washing the seasoning off.
  7. At this point you can either refrigerate the roast until you are ready to cook it or you may cook it immediately.
  8. Cook roast in slow cooker on high for 6-8 hours, or on low 8-10 hours.
  9. Remove roast from slow cooker and let it rest for 5 minutes. It will easily shred when pulled apart with two forks. Serve immediately. Store leftovers in the refrigerator in an airtight container.
  10. To make gravy, add cornstarch and 1/4 cup water to a sauce pan. Whisk until smooth. Using a baster remove drippings from the roast and add them to the saucepan. If you need more liquid you can add additional beef broth. Cook over medium heat, whisking constantly until desired consistency.
What I thought was great was the advice about preparing this ahead of time and refrigerating overnight. I forget that I can do that, so it was perfect for my day! I used the size of roast that I had, close to 2½ pounds, but left everything else the same. Suffice to say, I thought it was a little too salty and Tom thought that it was a little too peppery. Either way, Tom said it was excellent and I thought it was very flavorful.

Tuesday, May 26, 2020

Herbed Pork Chops and Smashed Potatoes

It was time for a dinner incorporating pork, so after a brief Pinterest search, I came across Herbed Pork Chops with Garlic Butter with an accompaniment of Crispy Smashed Potatoes. What is this madness, you say? Two new recipes in one day? Don't worry, I don't think it will happen again anytime soon.

Herbed Pork Chops with Garlic Butter

Ingredients
  • 4 thin-cut bone-in pork chops (5 ounces each)
  • 1 tablespoons extra virgin olive oil
  • ¾ teaspoon crushed dried rosemary
  • ½ teaspoon dried sage
  • ½ teaspoon paprika
  • ½ teaspoon salt
  • ½ teaspoon ground pepper
The Butter:
  • 4 teaspoons unsalted butter room temperature
  • 1 garlic clove minced
  • ½ teaspoon crushed dried rosemary
Instructions
  1. Place the pork chops in a shallow dish or mixing bowl.
  2. In a small bowl, whisk together the olive oil, ¾ teaspoon rosemary, sage, paprika, salt and pepper. Pour the mixture over the pork chops and massage to coat.
  3. Heat a large nonstick skillet over medium-high heat. Lightly coat with cooking spray.
  4. Cook the pork chops for 3 minutes, turn over and cook for an additional minute, or until the pork is just cooked through.
  5. Transfer to 4 separate plates and top each pork chop with 1 teaspoon of the garlic butter.
The Butter:
  1. In a small bowl, stir together the butter, garlic and rosemary.
Tom was complimentary of this dish. He said that the past couple of pork chop recipes that I've tried were good, so, even though he seemed to group this one with others, I still felt like he liked it. As for me, I think I should have crushed up the rosemary. I used the rosemary garlic butter, and there was a little too much rosemary.
Crispy Smashed Potatoes with Sour Cream and Chive Dip

Ingredients
  • 2 lbs baby red and yellow potatoes, 1-½ to 2 inches in diameter
  • Kosher salt and pepper to season
  • ½ cup extra-virgin olive oil, plus more
  • 1/3 c white vinegar, simmered and reduced to about 1/8 c, cooled
  • ¼ c fresh chives, finely chopped
  • 3 oz sour cream or creme fraiche
Instructions
  1. Preheat oven to 450 degrees.
  2. For the dip, in a small bowl, combine the reduced vinegar, chives, and sour cream. Mix, salt to taste, then refrigerate until ready to use.
  3. Simmer potatoes: In a large sauce pan, bring water to a boil with 2 Tbsp salt, then add potatoes and cover with a lid. Reduce heat to a simmer and simmer potatoes, for 30 minutes, or until a toothpick can puncture through and the center is tender—make sure to not overcook.
  4. Smash the potatoes: Place a sheet of parchment over a countertop or cutting board, then using the back of a plate or another flat, smooth surface, press the potatoes down until they are about ½-inch thick.
  5. Bake the potatoes: Line two large baking sheets (or one sheet if you need to work in batches) with foil. Brush the bottoms with olive oil, then place potatoes on top. Brush the tops with more oil and pepper—I don't use salt yet, to avoid drawing out water while baking. Bake for 27-30 minutes, or until potatoes reach desired crispiness and brownness.
  6. When potatoes have crisped up, remove them from the oven, gently sprinkle with salt, and serve warm with Sour Cream and Chive Dip.
Tom liked these a lot more. He even said I could put them in the regular rotation. Now, I didn't serve them with the dip, but he enjoyed them plain. I think they were good, and there's plenty of room to add different flavors.

Friday, May 22, 2020

Chicken with Creamy Mushroom Sauce

It was time to have chicken (not legs) for dinner, so I chose to make Chicken with Creamy Mushroom Sauce.

Chicken with Creamy Mushroom Sauce

Ingredients:
  • 8 bone-in, skin-on chicken thighs
  • Kosher salt and freshly ground black pepper, to taste
  • 2 tablespoons unsalted butter
  • 2 tablespoons chopped fresh parsley leaves
For the mushroom sauce
  • 1 tablespoon unsalted butter
  • 2 cloves garlic, minced
  • 8 ounces cremini mushrooms, thinly sliced
  • 2 tablespoons all-purpose flour
  • 1½ cups half and half
  • ½ teaspoon dried thyme
  • ½ teaspoon dried basil
  • Pinch of crushed red pepper flakes
  • Kosher salt and freshly ground black pepper, to taste
Directions:
  1. Preheat oven to 400 degrees F. Lightly coat a 9×13 baking dish with nonstick spray.
  2. Season chicken thighs with salt and pepper, to taste.
  3. Melt 2 tablespoons butter in a large skillet over medium high heat. Add chicken, skin-side down, and sear both sides until golden brown, about 2-3 minutes per side.
  4. Place chicken, skin-side up, in a single layer into the prepared baking dish. Place into oven and roast until completely cooked through, reaching an internal temperature of 175 degrees F, about 25-30 minutes. Drain excess fat.
  5. To make the mushroom sauce, melt remaining tablespoon butter in the skillet. Add garlic and mushrooms, and cook, stirring occasionally, until tender and browned, about 5-6 minutes.
  6. Whisk in flour until lightly browned, about 1 minute. Gradually whisk in half and half, thyme, basil and crushed red pepper flakes; season with salt and pepper, to taste. Cook, whisking constantly, until slightly thickened, about 3-4 minutes.
  7. Serve chicken immediately with mushroom sauce, garnished with parsley, if desired.
I am surprised to say that Tom actually liked it. He smelled the sauce, turned his nose up at it, I asked him to at least try it, he did and he liked it. He, of course, pulled out the mushrooms, but said he doesn't mind the flavor of mushrooms, just the texture. I, of course, liked it.

Thursday, May 21, 2020

Easy Tuna Casserole with Egg Noodles

The dinner rotation for today was seafood, and when I mentioned that Tuna Casserole was an option, Tom jumped right on it. I haven't made that dish in a while, since I would usually make Tuna Helper, and I can't seem to find my favorite variety, Tuna Creamy Pasta, at my local Wal-Mart or grocery store. After a search on the Internet for a recipe that seemed like it might be close to what I wanted, I chose the Easy Tuna Casserole with Egg Noodles.

Easy Tuna Casserole with Egg Noodles

Ingredients
  • 2 cups dry egg noodles, cooked to al dente and drained
  • 1 (12-oz.) can Chicken of the Sea Chunk Light tuna in water, drained
  • 1 (15-oz.) can Green Giant Low Sodium peas, drained
  • 1 (10.5-oz.) can Campbell's Cream of Mushroom soup
  • 1 cup whole milk
  • 2 tablespoons butter, melted (plus extra for greasing dish)
  • 1/3 cup dry breadcrumbs
  • salt & pepper, to taste
Instructions
  1. Preheat the oven to 400°F. While the oven is preheating, boil 2 cups of dry egg noodles to al dente according to the package instructions. Grease a 1.5-quart baking dish and set aside.
  2. In a large mixing bowl, stir together the cooked egg noodles, soup, milk, peas, and tuna. Transfer the mixture to the prepared casserole dish.
  3. Stir the breadcrumbs and melted butter together in a small bowl. Set aside.
  4. Bake for 20 minutes. Remove the casserole, sprinkle the breadcrumb mixture over the top, and bake for another 5 minutes or until the breadcrumb mixture is golden brown and the tuna casserole is hot and bubbling. Season with salt and pepper to taste when serving.
So, I added a stalk of celery and a little onion (shh, don't tell Tom) because of some of the reviews. Tom loved it, I thought there was an odd flavor. I think it came from the peas. They were frozen and really, really, really old. Tom definitely wants me to make it again some time, so I'll get to try it again with fresher peas.

Wednesday, May 20, 2020

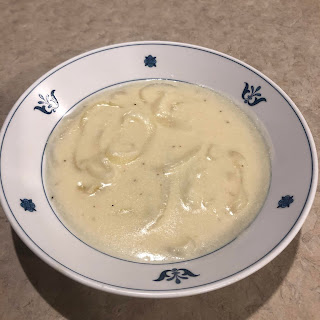
Buttery Onion Soup

So, I didn't feel like cooking a full fledge dinner tonight, because we had plenty of leftovers from the last few nights, so I decided to make something just for me - Buttery Onion Soup.

Buttery Onion Soup

Ingredients
  • 2 cups thinly sliced onions
  • ½ cup butter, cubed
  • ¼ cup all-purpose flour
  • 2 cups chicken broth
  • 2 cups milk
  • 1½ - 2 cups shredded part-skim mozzarella cheese
  • Salt & pepper to taste
  • Croutons, optional
Directions
  1. In a large saucepan, cook onions in butter over low heat until tender and transparent, about 20 minutes.
  2. Stir in flour. Gradually add broth and milk; cook and stir over medium heat until bubbly. Cook and stir for 1 minute longer; reduce heat to low. Add mozzarella cheese and stir constantly until melted (do not boil). Season to taste with salt and pepper. Serve with croutons if desired.
This recipe was "soup"er easy to make - but I found it to be a little bland. My mandolin setting for the onions was about 1/8 inch, but that must not have been thin enough, because the onions were still crunchy in the end. I think I'll make it again, but I'll use beef stock, work on the seasonings and either cut the onions thinner or cook them longer.

Monday, May 18, 2020

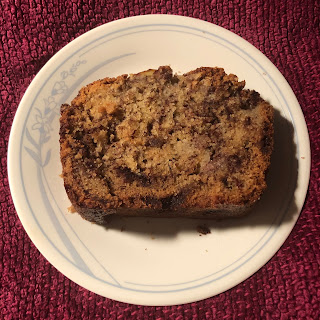
Cinnamon Swirled Banana Bread

I have a friend that regularly brings me fruit. I love it, but he recently gave me two bunches of bananas. That's more than Tom and I can eat before they get soft, so Tom recommended that I make banana bread. I looked up recipes on Pinterest, and the one for Cinnamon Swirled Banana Bread stood out as a clear winner. The bananas were getting old, so I made it tonight.

Cinnamon Swirled Banana Bread

Ingredients
Batter:
  • 1 cup (2 sticks) unsalted butter, melted
  • 1 cup granulated sugar
  • 2 large eggs
  • 1 teaspoon vanilla
  • 2 cups all-purpose flour
  • 1 teaspoon baking soda
  • 4 ripe bananas, mashed (about 1½ cups)
Cinnamon Sugar Swirl:
  • 2 tablespoons unsalted butter, melted
  • 3 tablespoons granulated sugar
  • 3 tablespoons dark brown sugar
  • 2 tablespoons ground cinnamon
  • 6 thin slices of banana, for garnishing
Instructions
  1. Preheat oven to 350°F. Lightly grease and flour a 9×5-inch loaf pan and set aside.
  2. In a large bowl, melt the butter and let cool slightly. Whisk in the sugar then the eggs and vanilla. Stir in the flour and baking soda. Fold in the mashed bananas until just combined.
  3. In a small bowl, use a fork to stir together the cinnamon sugar swirl ingredients until thick and well combined.
  4. Spread 1/4 of the batter evenly into the bottom of the prepared pan. Dollop 1/4 of the cinnamon sugar mixture over the batter in the pan and then make a nice thick swirl through the batter with a table knife or bottom of a wooden spoon. Place 1/3 of the remaining batter evenly over the first layer and swirl with 1/3 of the remaining cinnamon sugar mixture. Place 1/2 of the remaining batter evenly over the second layer and swirl with 1/2 of the remaining cinnamon sugar mixture. Spread the remaining batter evenly over the top and dollop with the remaining cinnamon sugar mixture. Make large swirls throughout the entire loaf. Place six thin banana slices down the middle of the batter.
  5. Place loaf pan on a baking sheet and bake for 60-70 minutes or until golden brown and a toothpick inserted in the center comes out clean. Let the bread cool in the pan for at least 30 minutes before removing to a wire rack to cool completely.

Let me tell you what, as it was baking, it smelled delicious! Ah, the smell the butter and cinnamon wafting through the air! It was good. Tom said it was a winner, so now I know what to do with old bananas. I think his biggest hang-up was that there are two whole sticks of butter in it. Oh well, he's got to complain about something. I'll be working on a pineapple next and have some really great ideas. I can't wait!!!!

Tuesday, May 12, 2020

Strawberry Rhubarb Jam

Whew! It's been a little bit since I finished a cross-stitch motif. Recently, I've been scheduled to work more than in the past few weeks, so getting back to this cross-stitch project has been challenging. But, I got back to it and I've finally finished the Strawberry Rhubarb Jam motif in Wild Olive's Jam of the Month Club.

The smiles, my usual complaint with my work, were a little better than usual, and I feel like I should add a little bow to the top of the jar.

Monday, May 11, 2020

Strawberry Fluff

I recently received a Pillsbury newsletter that featured a recipe for Strawberry Fluff Pie. I had to head to the grocery store tonight after work anyway, so after checking the Ibotta app, and seeing that strawberries were a featured item, I thought I'd give it a try.

Strawberry Fluff Pie

Ingredients
  • 1 box Pillsbury™ refrigerated pie crusts, softened as directed on box
  • 1 box (4-serving size) wild strawberry-flavored gelatin
  • ¼ cup sugar
  • ½ cup boiling water
  • 1 container (8 oz) frozen whipped topping, thawed
  • 2 cups sliced fresh strawberries
  • 8 fresh strawberry halves
Directions
  1. Heat oven to 450°F. Make pie crust as directed on box for One-Crust Baked Shell using 9-inch glass pie pan. Bake 9 to 11 minutes or until light golden brown. Cool completely, about 30 minutes.
  2. Meanwhile, in medium bowl, mix gelatin, sugar and boiling water until gelatin is dissolved. Refrigerate until mixture just begins to thicken and get syrupy, 10 to 15 minutes.
  3. Stir whipped topping into gelatin mixture until well blended. Fold in sliced strawberries. Spoon into cooled baked shell. Arrange strawberry halves around outer edge of pie. Refrigerate at least 2 hours or until serving time. Store in refrigerator.
So, I just made Strawberry Fluff - no pie. I used sugar-free gelatin and sucralose just to keep the calorie count down. Tom and I both enjoyed it. It's light and fluffy, and I think that the real strawberries really make the dish, since I usually don't care for artificial strawberry flavoring.

Friday, May 8, 2020

Creamy Baked Tilapia Spinach

It's time to try a new recipe! Tonight's dinner is Baked Tilapia with Spinach.

Creamy Baked Tilapia Spinach
  • 5 tilapia filets (1 lb)
  • 8 oz bag of fresh spinach
  • 3 tbsp butter sliced
  • ½ cup mayonnaise
  • ½ cup sour cream
  • ½ cup grated parmesan cheese
  • 2 cloves garlic crushed
  • 1 tsp Old Bay seasoning
  • ½ tsp Adobo seasoning
  • ¼ tsp black pepper
  • ¼ tsp salt
  • 1 cup shredded Monterey jack cheese
  1. Pack spinach onto the bottom of a baking dish. Top with butter slices and layer the fish fillets over the top.
  2. Then, combine the remaining ingredients, minus the cheese, and evenly spread over the top of the casserole.
  3. Finally, sprinkle the cheese and bake in a preheated to 500°F oven for 10 minutes.
  4. Enjoy

I liked it, especially when I got a mouthful of the sauce. Tom said it was good, but it wasn't something that he would want to eat on a regular basis. He said that if he was at a wedding reception, and that dish was what was offered, he would eat it and thoroughly enjoy it.

Friday, May 1, 2020

Quick Tartar Sauce

I was getting ready to eat some leftovers and thought that I'd like some Tartar Sauce to go with that fish. I found this recipe, and it was, indeed, quick and easy.

Quick Tartar Sauce
  • 1 cup mayonnaise
  • 2 teaspoons sweet pickle relish
  • 1 teaspoon prepared yellow mustard
  • 1 teaspoon lemon juice
  1. Stir the mayonnaise, relish, mustard, and lemon juice together in a bowl.
I didn't have any sweet pickle relish, but I did have Baby Gherkins, so I sliced one up and threw it into my mini food processor along with all of the other ingredients. I liked it, and I'll probably make it again, since I usually have all of the ingredients.